My last post on the CardMaker blog team! It’s been a blast!!
Check out my “Out of Box” tutorial using the newly released stamps and dies from Our Daily Bread Designs!
Thanks for stopping by!
Dawn

My last post on the CardMaker blog team! It’s been a blast!!
Check out my “Out of Box” tutorial using the newly released stamps and dies from Our Daily Bread Designs!
Thanks for stopping by!
Dawn

Welcome to our hop in combination with the Clearsnap designers! If you got here from the Rose’s blog then you’re in the right place, but no worries if you just happened along, I’ll have the hop list for you at the end of this post!
Also, Clearsnap will be hosting a giveaway of $50 worth of ColorBox products!! Woohoo!!

generously sent the CardMaker team an assortment of ColorBox Chalk inks. I already own quite a few of the colors, so getting some new colors was a real treat!! I love the coverage the pads give!
I tried something a little different with my first sample.

I took Splash and Chambray direct to paper for my background, giving a water effect for my flamingos stamped in Cheeky and Splash. The sentiment was stamped in Cheeky and Plumeria using a stamp positioner.
I stamped another flamingo, die cut and sponged the edges.
My base piece is just white cardstock with only the edges colored by taking the Cheeky pad DTP (direct to paper) then attached to a top-fold base card.

Here is another using a silhouette image inked in Chambray, sentiment in Lipstick Red, and the stenciled die in Yellow Ochre. The red base layer was done the same as above, edges only.
Here is the entire hop list. I hope you have enjoyed it so far! Now it’s time to send you on to Dana’s blog for her inky creations!
CardMaker
Rose Powell
Dawn Lusk (you are here!)
Dana Tatar
Carisa Zglobicki
Jennifer Priest
Pamela Haskin
Chana Malkah Harris
Lisa Silver
Kymona Tracey
Kim Klinkovsky
Linda Beeson
Clearsnap
Thanks for stopping by!
Dawn
(products used: the Clearsnap icon shows cat’s eyes, but full size pads were used for these projects)
 |  |  |  |  |
 |  |  |  |  |

Normally just picking out the paper takes that long! LOL!!
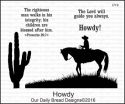
Check out my CardMaker blog post using Our Daily Bread Designs Ride ‘Em Cowboy today to learn how!!
Thanks for stopping by!
Dawn

Welcome to the Reverse Confetti and CardMaker hop!
What fun! The CardMaker team was given a Reverse Confetti store credit and allowed to pick anything we wanted! It was difficult but as soon as I saw the Fabulous Flamingos with coordinating Fabulous Flamingo Confetti Cuts, I knew what I was ordering! I have a granddaughter that has been crazy for flamingos since she was a toddler! Perfect for her upcoming birthday!
You should have gotten here from Leigh’s blog, but not to worry if you just happened here! The entire hop list can be found on the CardMaker blog and Reverse Confetti blog. Another reason to visit the Reverse Confetti blog, they are giving away a $25 store gift certificate!!
Here is my first card…

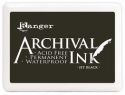
I stamped the body (all stamped on my MISTI) with Clearsnap Cheeky, then did a combo for the beaks of Splash, Plumeria and Cheeky and a little Ranger Jet Black for the eyes and beak edge. The sentiment is stamped (with the help of my MISTI) in Cheeky and Plumeria.


The stamp and coordinating dies make it easy to whip up a card in no time!
For this one, I started by stamping the 4 background birds with Clearsnap Tangerine, then colored over the legs and around the bodies with a Copic to resemble water. I added the clouds with a homemade cloud template and Ranger Tumbled Glass and Broken China.
Then stamped and die cut the main bird, stamping the legs several times to make them darker.

The sentiment is stamped with Clearsnap Plumeria and Chambray.

Now it’s time to send you on to Audrey’s blog.
Have fun checking out all the cool creations!
Thanks for stopping by!
Dawn
| | |

Hi and welcome to the CardMaker Blog team and The Greeting Farm blog hop! You should have arrived here from Lisa’s blog, but no fear if you just happened along…the entire hop list is on the CardMaker post. Be sure to read all the way to end of my post for info on a fantastic give-away!
Here are the 2 sets I chose for my post today, so versatile!


I stamped the fox, masked it and stamped the stump. I colored the images with Copics and a white paint marker. I used my MISTI and overstamped the images again to make them pop. I masked the images then air-brushed the background. I also added a little white acrylic paint with my finger for some puffy clouds.
With fine tip markers, I sketched in some grass and flowers.

My second sample is one for a quick, “I need a card NOW” type card. LOL

I masked off where the embossing folder would be, and sponged with inks, then embossed with the folder.
Now it’s time to hop along to Pamela’s blog.
Don’t forget to stop by The Greeting Farm’s blog, they’ll be giving away a $50 gift certificate!!
Thanks for stopping by!
Dawn

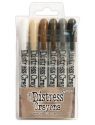
Crayons that you can color, smudge, watercolor, blend… say what?! That’s what the CardMaker Blog Team were sent to play with, Tim Holtz® Distress Crayons.
I love my Distress Inks, and now crayons that blend in the same way! I received the set that has Antique Linen, Vintage Photo, Walnut Stain, Hickory Smoke, Black Soot, Picket Fence.

Here is the blog hop
I needed a birthday card for an “older” guy friend and decided to put these crayons to the test!
I started by dry embossing part of my background with Tim’s Sizzix Bricked embossing folder. I scribbled the different colors over the bricks then smudged with my finger, adding some darker shades here and there for a real weathered brick look.
For the ‘sidewalk’ I lightly colored Black Soot and used my waterbrush to move the color around.

The background turned out great, but could I actually color an image with the crayons? The answer is YES!
I stamped the old guys using my MISTI, then took the crayons and scribbled them in a watercolor palette. From there I used my waterbrush to pick up color and paint my image. I did use a little marker on the cheeks for a little rosy look. When I was satisfied with how they looked, I overstamped the image with a strong black ink to make it pop, and, using scissors did some fussy cutting.
After I popped up the image, I took my waterbrush and added some shadow with the Black Soot crayon.
The quick sign is just the sentiment stamped and the Black Soot crayon taken around the edge and the waterbrush pulling the color inward. I colored a toothpick for the ‘stick’. I dry embossed a piece of cardstock cut to resemble a bucket, scribbled the Black Soot crayon over and waterbrushed. I took a sanding block lightly over the bucket to give it a ‘worn’ look.
I think the old guys look pretty good monochromatic! Now I need to get the other crayon colors available.
I hope you had fun looking at all the different ways to use these Distress Crayons! I sure had fun creating my sample!
Thanks for stopping by!
Dawn
 |  |  |  |  |
 |

Welcome to the CardMaker Blog Team and American Crafts blog hop! If you got here from Linda’s blog, then you’re in the right place, but no worries if you just happened here! I’ll have the hop list at the end of my post.
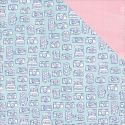
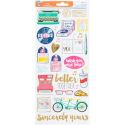
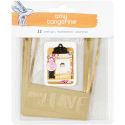
The team was sent all kinds of fun stuff from the Amy Tangerine Better Together Collection! As soon as I saw Peanut Butter+Jelly, {cameras, how perfect!} I knew I wanted to make a layout with some pictures from our recent trip to Florida! I also used the Sticker Book, Photo Overlays, Die Cut Shapes, Thickers Stickers, and a piece from Cloud+Sunshine. All from her collection.
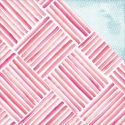
Oh! and the paper is double-sided so you always have a match!

Here is the layout out of the 8.5x11 acrylic frame, it’s so hard not to get a reflection!
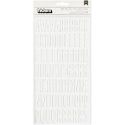
I loved the letters from the Thickers Stickers! I colored them with a marker to match the paper. They’re easy to move around too in case you get them in the wrong spot! {ask me how I know!}
The Photo Overlays are cool to highlight or frame that special photo. I loved seeing the sunrise every morning and having my morning coffee with the surf and seagulls!

Now it’s time to send you onto Kim’s blog to see her great project!
Stop by the American Crafts blog too for lots of inspiration!
Thanks for stopping by!
Dawn
 |  |  |  |  |